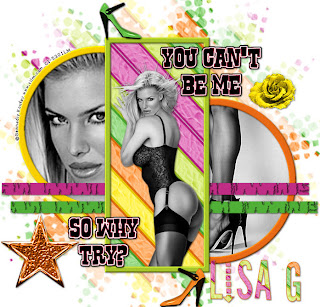
This tut was written by me, Lisa G on May 1, 2010. Any similarities to any other tut is purely coincidental. I used PSP 9 for this tut.
Supplies- kit of choice, I used a kit by AWDesigns, which is exclusive to members of intoxxikated-intentionz.com
Her blog is here You can use any kit you like. Thanks Anna!Tubes- You will need two close ups and one full tube. I am using the beautiful work of Gennadiy Koufay. You must have a license to use this work, which you can purchase here.Please do not use this artist's work without a license.Template- template_136_Beth_09 which you can get here Thanks Beth.
Mask-Vix mask 147 you can get here Thanks Vix.
**remember to add drop shadow of choice to each element**
--Open template_136_Beth_09 in PSP. Delete the copyright layer.
--Activate horizline1-go to selections-float-defloat-modify-expand by 1
--Add a new raster layer-fill with color of choice-I used #50af37; go to effects-xenofex 2-crack with these settings:
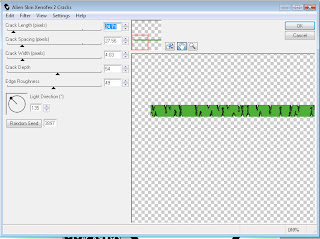 24.71, 27.56, 4.03, 54, 49, 135
deselect, delete horizline1 layer.
--Activate Horizline2-select all, float, defloat, expand by 1, new raster layer, fill with color of choice-I used #c02d85-effects xenofex 2 cracks-same settings-deselect, delete horizline2 layer.
--Activate black circle layer, select all, float, defloat, expand by 1, new rater layer, fill with color of choice-I used #ffd604, delete black circle layer, apply inner bevel using these settings:
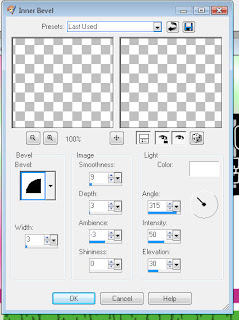 --Activate black circle frame 2, select all, float, defloat, expand by 1, new raster layer, fill with color of choice, I used #f06d17, apply same inner bevel as before, delete original circle layer.
--Activate blackrectframe layer, select all, float, defloat, expand by 1, new raster layer, fill with color of choice, I used aecc2e, deselect, apply same inner bevel as before, delete original rectangle frame layer.
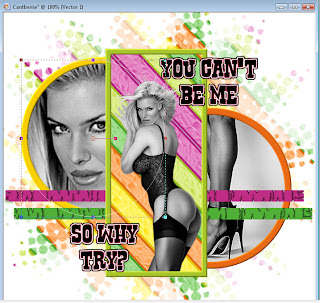
--Using magic wand, select inside frame (raster 4, make sure this layer is active) expand by 3, paste close up as a new layer. Selections, invert, press delete on keyboard, select none. Move tube below frame.
--Using magic wand, click inside second frame (raster 5, make sure this layer is active) expand by 3, paste second close-up as a new layer. Selections, invert, hit delete on keyboard, move below frame layer.
--Activate greyrectbg, select all, float, defloat, fill with pattern of choice, select none.
--Delete background layer, add new raster layer, fill white, move to bottom. Add new raster layer above white layer, fill with pattern, apply Vix_mask147. Merge group, resize by 115%, all layers UNchecked.
--Paste full tube, move rect frame and bg up to tube (frame above tube, bg below tube). Erase any of tube that overhangs frame.
--On each words layer, select all, float, defloat, adjust, hue & saturation, colorize, hue 248, sat 252. Add any elements you like.
--Resize by 90% all layers checked. Add copyright-I put an ellipse over the first frame layer, added text around the circle, and closed visibility on ellipse. Add gradient glow on copyright to make more visible.
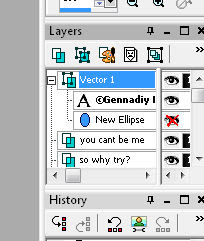
--Add name, I used Stereofidelic size 72 with pattern as fill.
Thank you for trying my tut!
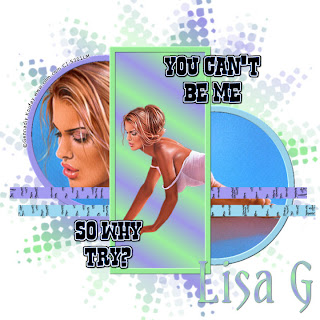
Here is another example I made using different colors.


No comments:
Post a Comment